On this page
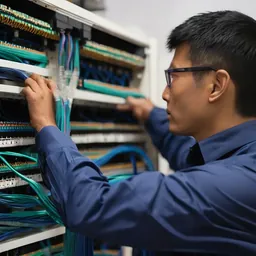
A floor goes down. The technician opens the rack and finds 140 identical blue cables, no labels, hanging down in front of every switch port. A five-minute job becomes a two-hour hunt, and somewhere in the middle of it someone pulls the uplink by accident.
A messy rack isn't just ugly. It blocks airflow, slows every fix and makes it more likely that someone takes the network down themselves. When we assess another installer's work, the first thing we look at is the back of the rack.
Size: buy bigger than you think
| Type | Typical size | Best for |
|---|---|---|
| Wall-mount | 6U–15U, 450–600 mm deep | Floor closets and small branches, 1–2 switches |
| Floor-standing network | 27U–42U, 600/800 mm wide | Server rooms, several switches and patch panels |
| Server rack | 42U, 1000–1200 mm deep | Servers, storage, rack-mount UPS |
Leave 30–50% free space beyond what you use today. We have never seen a rack that turned out "too big" three years later. With lots of patch panels, go for 800 mm wide; the side channels for vertical cable management make everything easier.
Check server and UPS depth before ordering the rack. Many 2U servers are longer than 750 mm and won't fit in a 600 mm-deep network cabinet.
Worked example: counting rack units
One rack unit (1U) is 44.45 mm of height in a standard 19-inch rack. Count every item before you choose a size. A typical office floor with 80 data outlets and 16 IP cameras:
| Item | U |
|---|---|
| 4 × 24-port Cat6 patch panels | 4 |
| 4 × horizontal cable managers | 4 |
| 2 × 48-port PoE switches | 2 |
| Fiber patch panel for uplinks | 1 |
| Firewall and ISP router on a shelf | 2 |
| NVR | 2 |
| Rack-mount 3 kVA UPS + external battery pack | 4 |
| Total | 19U |
Add 40% for growth: 19 × 1.4 ≈ 27U. A 27U cabinet would be full the day someone adds a second floor or ten more cameras, so we would order 32U, or 42U if the floor space is there. The cost difference between those sizes is small next to replacing a rack later and re-patching every port.
Vertical PDUs mounted on the rear posts use no rack units at all, but they need a rack that is wide or deep enough. Check before you order.
Power inside the rack
Devices with two power supplies (servers, core switches, some firewalls) should plug into two different PDUs, ideally fed from different UPS units or circuits. If both supplies hang off the same power strip, the second one protects nothing. Label every PDU with the breaker number it comes from in the distribution board, and every outlet with the device it feeds. For the UPS itself, see our UPS sizing guide.
Top to bottom
At the top, patch panels interleaved with switches: patch panel, cable manager, switch, repeat. That keeps every patch cord as short as possible.
In the middle, the firewall, router, NVR and small servers.
At the bottom, the UPS and batteries. They're the heaviest items, so they keep the rack stable, and if a battery ever leaks it doesn't drip onto anything else.
Two things that get forgotten: use rack-mount PDUs rather than power strips from the market, and fit blanking panels in empty slots so hot exhaust air doesn't recirculate to the front.
Cable management
- Right-length patch cords (0.5 m, 1 m). A 3 m cord coiled inside the rack is where the mess begins
- Color-code by function and write the scheme down. For example: blue = data, yellow = CCTV, red = uplink/firewall, green = voice
- Velcro, not plastic zip ties. Overtightened ties crush Cat6A and degrade crosstalk performance
- Keep AC power cords away from data cables, on opposite sides of the rack
- Don't kink fiber. Use fiber trays or ducting that respects the bend radius
Labeling
We follow the idea behind ANSI/TIA-606: every cable carries the same identifier at both ends, and the identifier tells you where it goes.
Example: B1-F2-R01-PP02-24 = building 1, floor 2, rack 01, patch panel 02, port 24
| What to label | Example |
|---|---|
| Desk outlet | F2-R01-PP02-24 |
| Patch panel port | Matches the outlet |
| Rack | B1-F2-R01 |
| Fiber uplink | FO-R01-R02-01 |
| Device | SW-F2-01, FW-01 |
Use printed labels from a label printer rated for heat and humidity. Marker-pen handwriting fades within one rainy season.
Keep label codes in Latin letters and numbers so Lao, Thai and foreign contractors can all read them. Put the explanations in the documentation, in Lao.
How much labeling is enough?
The current edition, ANSI/TIA-606-D (2021), sorts sites into four administration classes. Class 1 is one equipment room serving one building. Class 2 is one building with several telecom rooms. Class 3 is a campus with cabling between buildings, and Class 4 ties several sites together. Most offices, hotels and schools in Laos fall into Class 1 or 2. A mine with a process plant, a camp and an office linked by fiber is Class 3, and that is exactly where people leave the building code out of the label and regret it later.
Placement rules we use on every job:
- Put the label close enough to the connector to read it without unplugging anything
- Use self-laminating wrap-around labels on cables, so the print sits under a clear layer and doesn't rub off
- Label the patch cord at both ends too, not only the permanent cable
- Print the same code on the outlet faceplate in the room. No handwriting
Fixing an existing rack: a weekend plan
- Photograph the front and back, and export the switch configurations and MAC address tables before touching anything.
- Agree a maintenance window with management. A rack with 96 ports usually takes two technicians one long day.
- Tone out every horizontal cable to its outlet and write the new code on a temporary tag.
- Print permanent labels for both ends.
- Pull the patch cords one switch at a time, never the whole rack at once, and re-patch with correct-length, color-coded cords. If something breaks, you know which block caused it.
- Check that every uplink, phone, camera and access point comes back, and have real users test on the next working morning.
- Update the port map and save the new photos with the date.
Documentation you need
A port map: patch panel port to switch port to VLAN to device. Photos of the front and back of the rack on handover day. Test results for every link. And above all, update it every time something changes. Out-of-date documentation is more dangerous than none.
What we find in other people's racks
Racks full in the first year. The UPS mounted at the top, or sitting on the floor outside the rack with power leads across the walkway. No horizontal cable managers, so cords hang over the ports. Labels on one end only. And racks squeezed into storerooms with no air conditioning, next to cardboard boxes and the mop bucket.
Maintenance
| Frequency | Task |
|---|---|
| Weekly | Check device and UPS alarm LEDs and rack temperature |
| Monthly | Verify any new cables are labeled and documented |
| Quarterly | Clean filters and fans, test the UPS, back up device configurations |
| Yearly | Review all documentation, inspect grounding, plan capacity |
One rule keeps a rack tidy for years: nobody adds or moves a cable without updating the labels and documentation. Make a one-page change form and require everyone to use it, including outside contractors and the ISP's technicians. Without that rule, even the best installation drifts back into chaos within a year or two.
Racks in Lao conditions
Dust (mines, construction sites, factories, warehouses beside unpaved roads): closed racks with filters or IP-rated enclosures, with the filters cleaned on schedule. A clogged filter is worse than none, because no air gets in at all.
Heat: where there's no air conditioning, fit roof-mounted exhaust fans and a temperature sensor that sends alerts. In April, a rack in a closed, unventilated room easily passes 40°C.
Lightning: bond the rack to a proper earth and inspect it every year, ideally before the rainy season starts.
Humidity: when the air conditioning switches off at night or during a power cut, a cold rack in a humid room can collect condensation. Avoid big temperature swings, and never place a rack under an AC drain or water pipe.
Insects and rats: seal the cable entries at the top and bottom of the rack with brush strips or grommets. Ant nests inside switches and rats chewing patch cords are things we find regularly in ground-floor rooms.
How does your rack look?
Open the back door and take two photos, front and back, and send them on WhatsApp. We'll tell you whether it needs a full rebuild or just labeling and documentation, and how much downtime that would take.
- #rack
- #labeling
- #cable management
- #tia-606
- #structured cabling
- #documentation